
How to Upcycle a Side Table!
Looking for a fun easy DIY project to add some personality to your space? This upcycle project is perfect for you. We'll show you how to transform a tired side table into a stunning piece using only two products: Cabot's Interior Stain Water Based and Cabot's Cabothane Clear. Get ready to be amazed at how quickly and easily you can breathe new life into your old furniture!
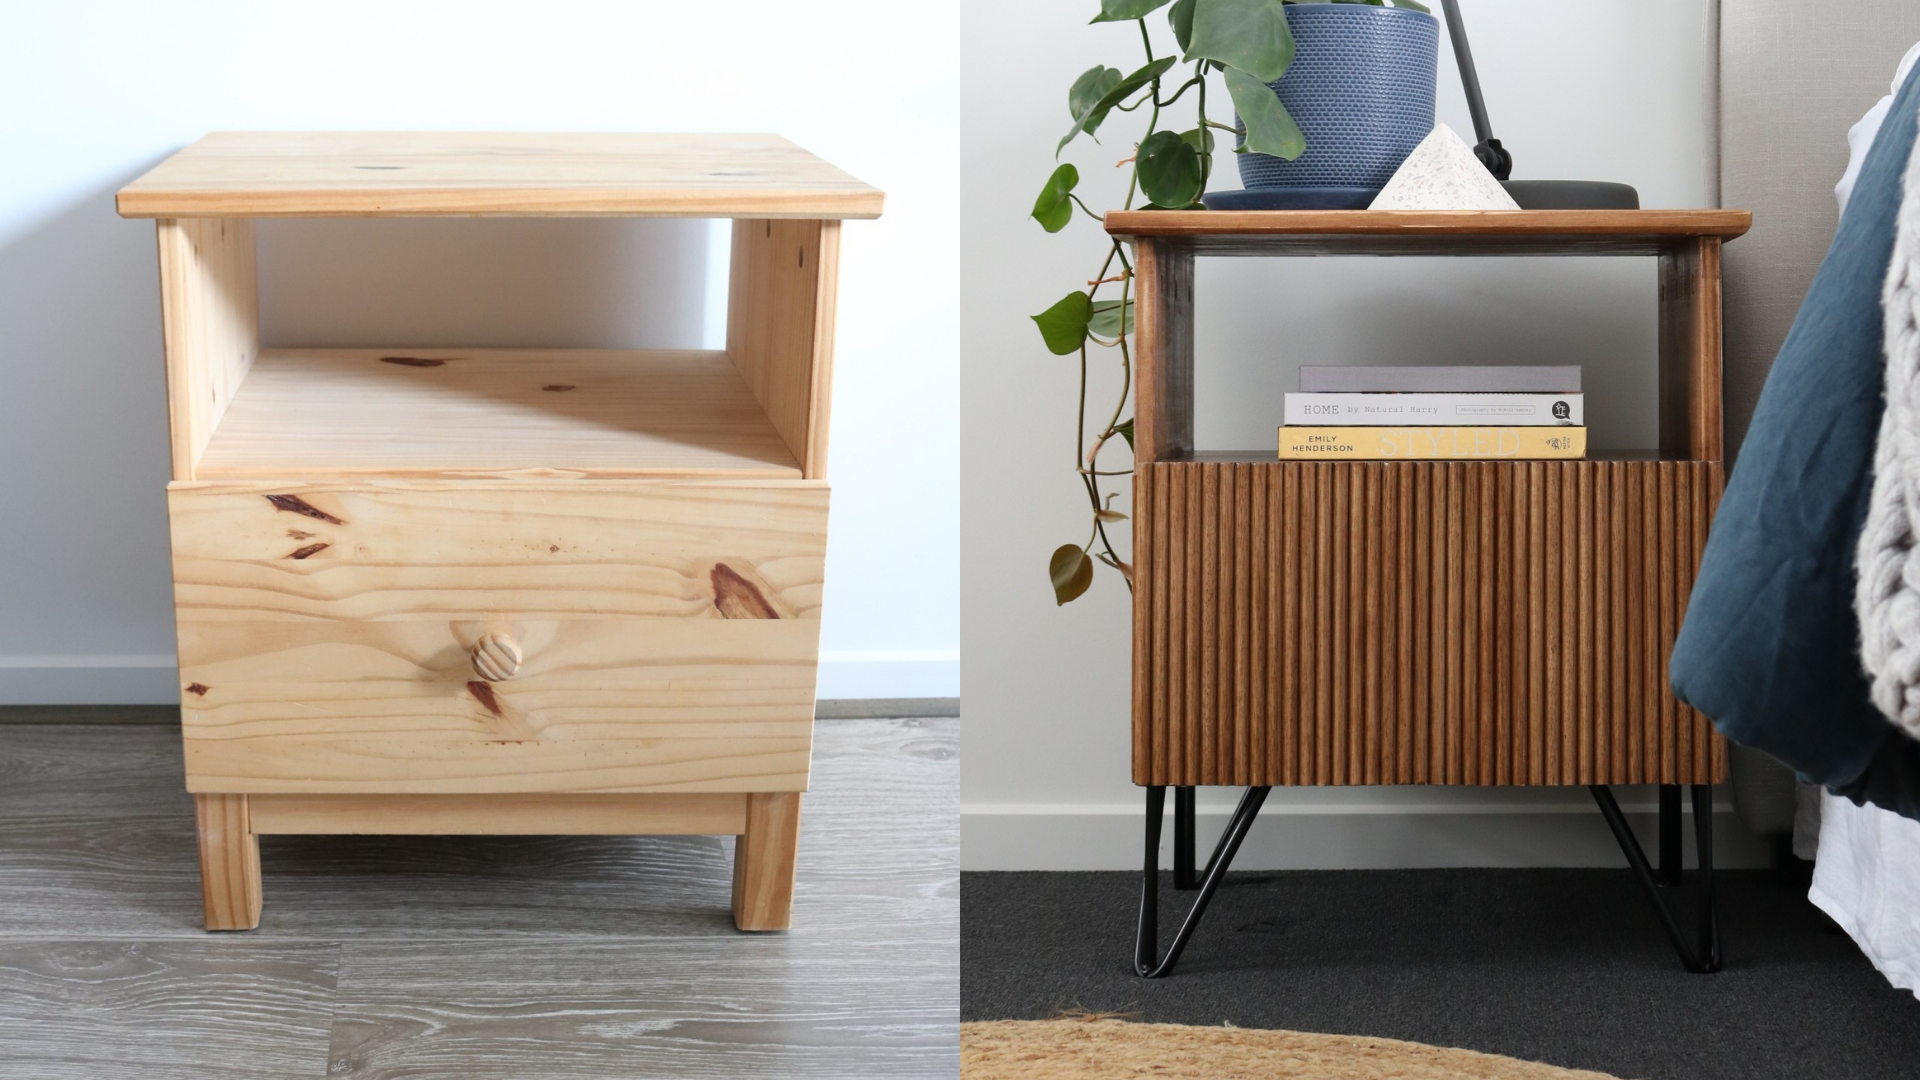
Step 1. Find that special something that needs a little TLC!
Step 2. Most timber restorations require sanding & I’d recommend using an orbital & corner sander. Start at a rough & tough 80 grit then work your way up to 240 grit for a nice smooth finish. The smoother you go the better your stain & varnish will look.
Step 3. Cut your half dowels to size before using a sturdy wood glue to secure them to the drawer front. Clamps down & let them dry! If your dowels are a little uneven, once they are glued down you can then use a saw to trim & even them up. Sand back any splinters that occurs here. TIP: Cut the dowels slightly longer that your draw to create a finger pull opening!
Step 4. To tint the wood colour use Cabot's Interior Stain product. I’d recommend the water based in a matt finish. I went with the walnut here to darken & completely transform the pine. The stain is easily applied with a cotton rag. Use a liberal amount & evenly rub into the wood surface. Depending on the colour strength you desire you can give it a 2nd coat.
Step 5. Once the stain is dry apply Cabot's Cabothane Clear water based varnish, also in a matt finish. Apply this using a soft brush in long even strokes across the wood surface. Wait two hours & apply your 2nd coat. TIP: If there are any visible brush strokes use a 360 grit sanding block to smooth back after each coat.
Step 6. Try enhancing the look with some fresh new hairpin legs.
Step 7. Voila! Time to style & admire your finished project!


